Mitosynth
Vectors, Grids, and Prefilter, Oh My
So, I’ve had a couple of emails recently from people about Mitosynth: how the various modes (Sampler, Blender, Painter, Additive and Gridcøre) work together and how Prefilter fits into the picture. I thought I’d take some time out from working on my new project to write up an explanation and share it with everyone.
First up, a little background…
Vector Synthesis
Vector Synthesis was a popular synthesis method back in the late 80s and early 90s. I believe the Prophet VS was the first commercial synth to offer it, but the technique is often associated with the Korg synths of the early 90s.
The idea is pretty simple: Take a square. Place four different sounds at its corners. Use a 2D control (typically a joystick or touchpad) to set a position inside that square (a 2D coordinate, or vector). You then morph between the four sounds, each being stronger or weaker in the mix depending on their closeness to the “current position”, the vector:
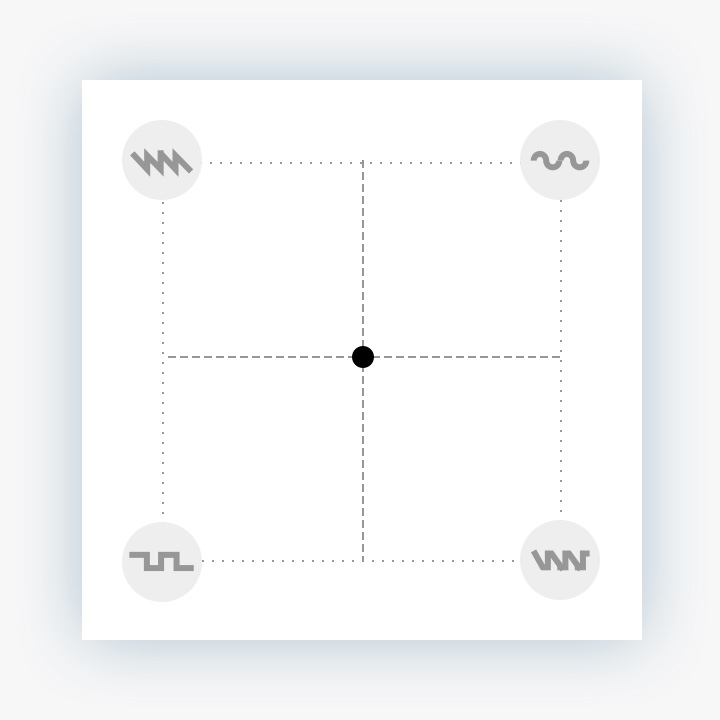
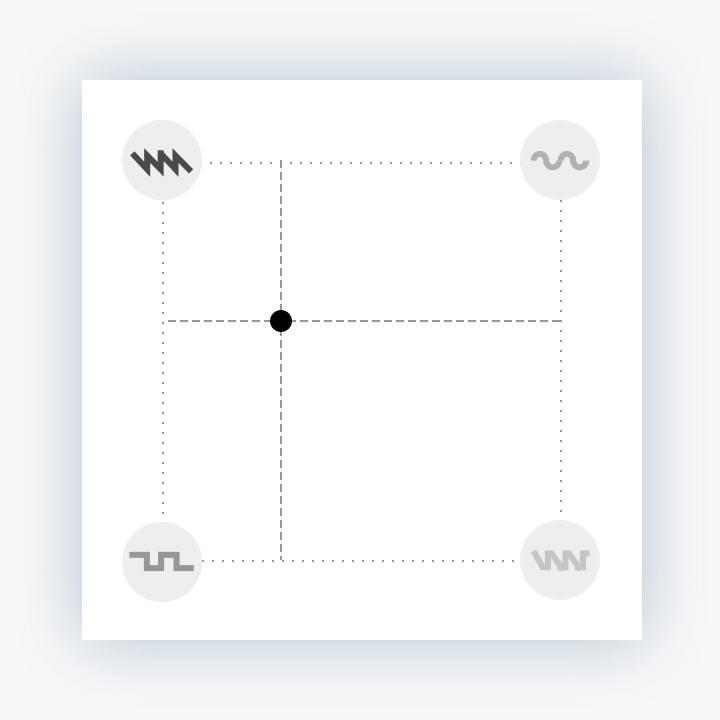
It’s a little bit like you’re walking around a room with four speakers placed in the corners: stand in the centre and you hear all of them equally. Approach one, and it gets louder while the others are less noticeable:
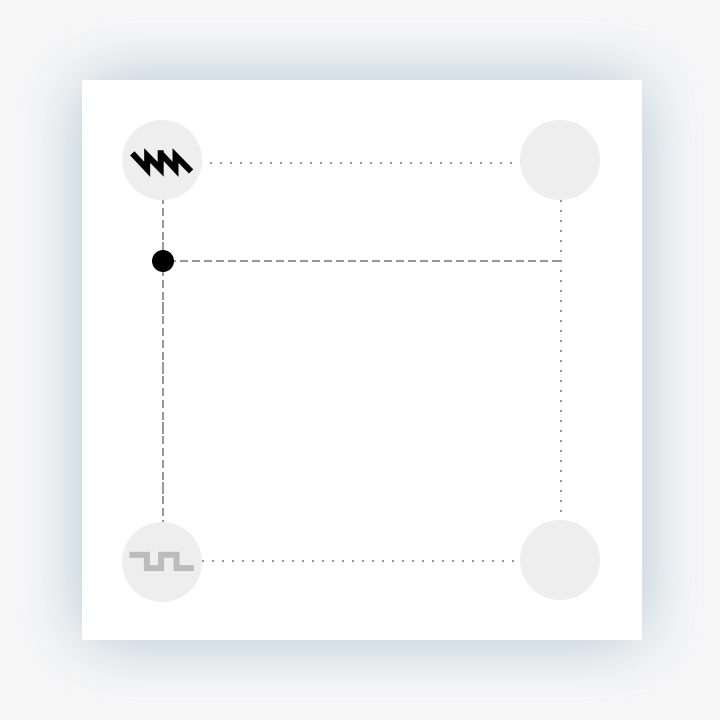
Unlike a real room, however, the dynamics are strange – but in a good way. When you’re right next to one “speaker”, the others are silent, and if you’re standing on a line between two “speakers”, you can hear both clearly (depending on how close to each you are), but the other corners are silent:
As you move around, it’s designed to provide a smoothly crossfading mix. This lets you create complex, evolving soundscapes, while keeping the interface simple enough to wrap your head around and intuit how to use the joystick/touchpad to obtain different sounds.
A “proper” vector synth doesn’t just let you directly control the vector, it also lets you program it to follow a path “around the room”, so the sound evolves itself over time.
Wave Chamber
Mitosynth takes that idea, and builds on it, in a number of ways. The most obvious way is that instead of just 4 sounds, you have up to 32. It works by extending the grid – in our room metaphor, it’s like you knocked down the wall of the room, into the next one. You make the room twice as big, but leave the existing speakers where they are, then add some more in the newly-opened area. And you can keep doing it, in both directions:
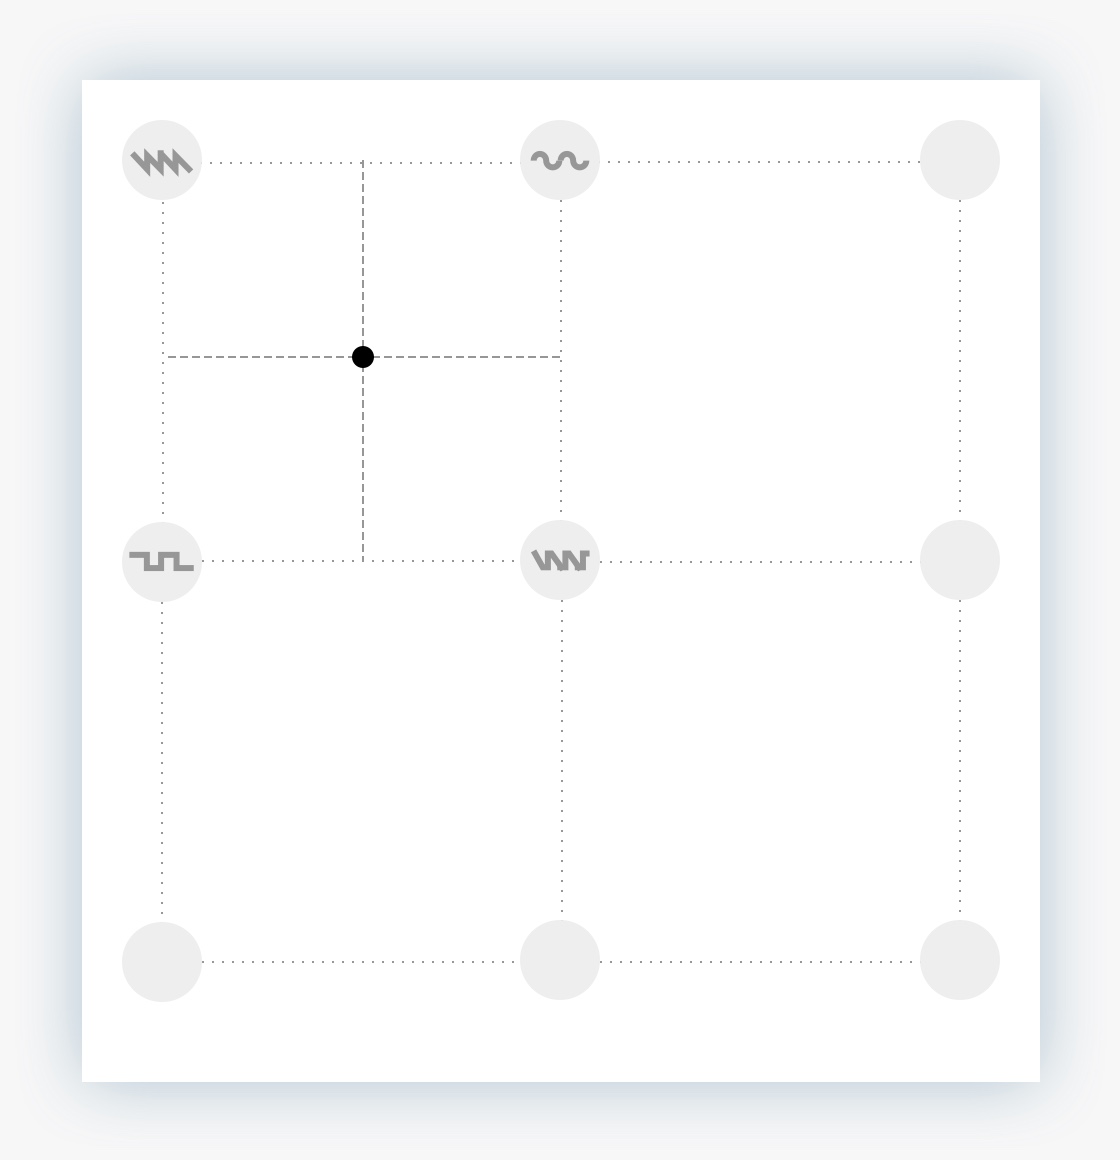
The same vector principle holds, though: whichever “square” you’re in, you’re still getting a mix of the four “speakers” around you. Remember that at the speakers themselves, or the lines that join them, you don’t hear anything from the other, further-away speakers: this means you can cross over from one square to another without any glitches or pops, just a nice clean transition.
So now you can smoothly cross-mix between up to 32 sounds, playing 4 at any one time. And then you can take a wandering path around that field of sound.
This big room is Mitosynth’s Wave Chamber, and it’s the basis of the synth engine. Whatever you’re doing in Mitosynth, whichever mode you’re in (Sampler, Blender, Painter, Additive or Gridcøre), under the covers, the synth engine itself is always doing the same thing: a Gridcøre Wave Chamber of different sizes.
In Sampler mode, there’s just a single speaker and you’re always standing right next to it.
In Blender, there’s a row of speakers in a neat line, and you can slide along that line.
In Gridcøre, you have full access to the grid of sounds to set it up exactly the way you want it.
Additive and Painter modes are a different view of the Blender, where you can design your own sounds to play out of the speakers.
Put another way, Sampler is a Gridcøre of 1x1:

Blender, Additive and Painter are a Gridcøre of 1xN (where N is the number of items in your blend list).

The Morph control then “walks” you along the horizontal line that joins the three sounds, blending between them as it goes.
If you switch into Gridcøre from one of those other modes, you can see exactly how they are simplified Gridcøre setups – and then extend the grid yourself into the next dimension, if you like. In Gridcøre, the Morph X still walks horizontally, while the Morph Y walks vertically, giving you a 2D vector.
Although there are two independent dials to control Morph X and Morph Y, if you want a “traditional vector synth” experience, tap each of the dials and set them to be controlled by the same XY Pad, putting the Morph X on the pad’s X axis and Morph Y on the Y axis. Then enjoy using the XY Pad to relive the 90s :)
And I mentioned that proper vector synthesis allows you the option of programming the path the vector takes around the room. In Mitosynth, you do this by tapping a Morph control and putting it into one of the automation graph modes. There you can use various LFOs, sequencers, random noise, and more to drive around the Wave Chamber.
Prefilter
So what about Prefilter?
Well, in a sense, it’s just a convenient way of making complex Gridcøre setups automatically. It works by taking the current non-Gridcøre setup, making copies of it, arranging them one below another, and applying a filter to each step.
So, let’s say you start with the same Blender setup as before:

If you then enabled Prefilter, with three steps, it would take that 3x1 layout and extend it into a 3x3 layout:
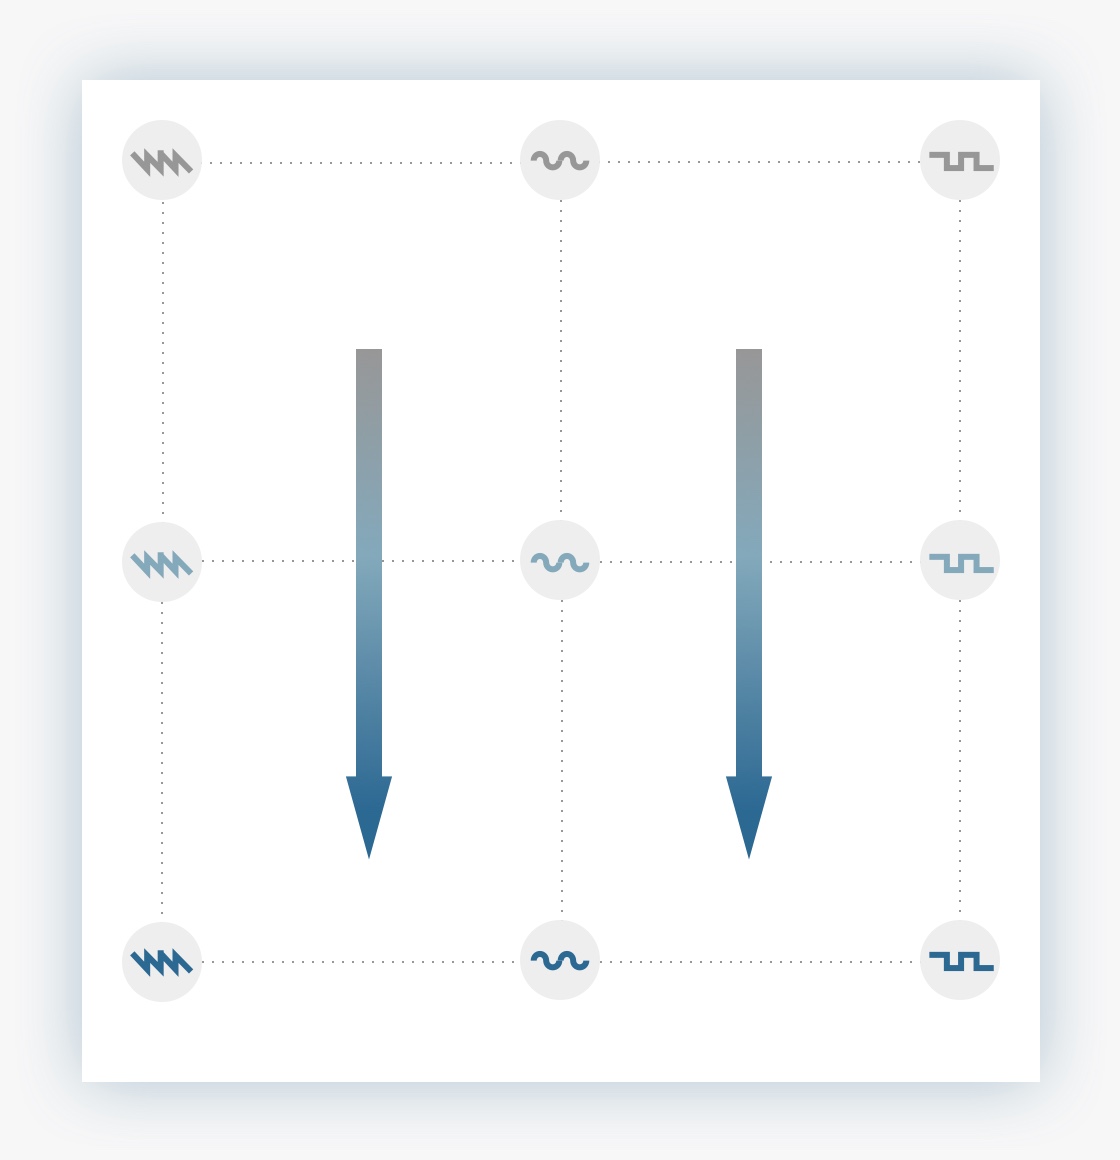
Each new row is made by taking the first row, and copying it exactly. Then it applies different amounts of your chosen filter (low pass, tube resonance, whatever) to the new row.
The amounts are set by the Prefilter controls — when you first switch it on, the controls are set to Constant, so you won’t hear anything new – each row is an identical copy to the previous one.
But if you tap a Prefilter control, select Linear, and change the values, you’ll get a blend of different filter amounts, as shown in the diagram. In Linear mode, you set a max and min for the value. The min value is used for the top row. The max value is used for the bottom row. The in-between rows use in-between values, blending smoothly as it goes down the rows.
Now you can use the Step Morph control to wander up and down the “room” (giving you different Prefilter settings), as well as the regular Morph to move left-to-right across it (giving you the different sounds from the original Blender setup).
The Overall Flow
When you design a sound in Painter or Additive mode, when you import a sound from another app, or when you load a sound from the library, what you’re doing is picking a sound to play out of one or more “speakers” in the Wave Chamber.
The Envelope and Modulation settings affect how those sounds are played, as do all of the Wave Chamber settings – except the Morph controls, which control the morph of the sounds you’ve set up.
The output from the Wave Chamber is then sent to the Effects you’ve installed, the finally the reverb (if enabled) – and finally out to your ears.
And I think that wraps up this post!